• Roundness is of particular importance when designing components for fit and function.
• Most of the methods considered so far are suited to measuring with single points, but a round shape is a collection of points, with each point having significant influence if out of tolerance.
• Precise roundness measurement equipment is expensive
• Two fundamental methods for measuring roundness are,
Intrinsic: uses points on the round surface to measure from
Extrinsic: uses a separate round surface for a reference (e.g. a precision bearing)
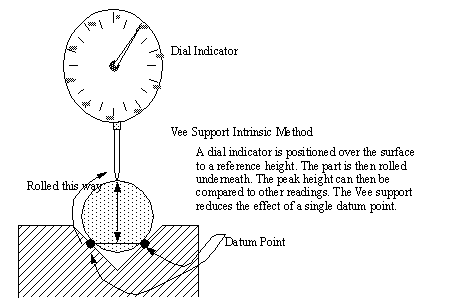
• Three methods for Intrinsic roundness testing are shown below,


• All three of the intrinsic methods are inexpensive
• The Intrinsic methods all have an important limitation. In particular, if the deformation of the round is small, the methods will deal with it reasonably, but if the deformation is large enough to make the shape non-cylindrical, then the results will err significantly.

• When using The Flat Plane, or the Center to intrinsically measure roundness, the diameters can be directly obtained, but when using the Vee block, some additional calculations are required.

• The vee block method has particular disadvantages,
a number of angles are required (the standard angle is 90°)
only suitable for regular odd lobed figures
• The center support method also has disadvantages,
The part may be bowed, or warped
off center or degraded center holes will decrease reading quality
the centers themselves can also affect readings
• The features of this methods are,
1. the reference datum is not points on the object, but a separate precision bearing
2. The axis of the part being measured is aligned with the machine bearing axis
3. A stylus is moved in to contact the part, and then it moves about in a circular path
4. The deflection of the stylus is amplified onto a polar plot to be used in evaluation of the part
• We can measure the out of roundness value as the minimum distance between two concentric circles that enclose/envelope the trace profile. This distance must obviously be divided by the magnification.
• Only roundness deviations are amplified. This creates distortions in the trace.
• The Talyrond machine also uses a low pass electronic filter to reduce the roughness that is shown on the plot. But this still shows the lobing.
• Eccentricity: the Talyrond can also be used to detect concentricity. A simple example is a bearing race shown below.

• An example of the part discussed above, is now shown in a trace from the Talyrond

Problem 11.1 Show that the vee block method exaggerates errors using a round that is deformed into a triangular shape.