
|
|
|
11.2 METHODS OF MEASURING SURFACE ROUGHNESS
������������There are a number of useful techniques for measuring surface roughness,
11.2.1 Observation Methods
������������Human perception is highly relative. In other words, without something to compare to, you will not be certain about what you are feeling.
To give the human tester a reference for what they are touching, commercial sets of standards are available.
Comparison should be made against matched identical processes.
One method of note is the finger nail assessment of roughness and touch method used for draw dies in the auto industry.
11.2.2 Stylus Equipment
������������One example of this is the Brown & Sharpe Surfcom unit.
Basically this technique uses a stylus that tracks small changes in surface height, and a skid that follows large changes in surface height. The use of the two together reduces the effects of non-flat surfaces on the surface roughness measurement. The relative motion between the skid and the stylus is measured with a magnetic circuit and induction coils.
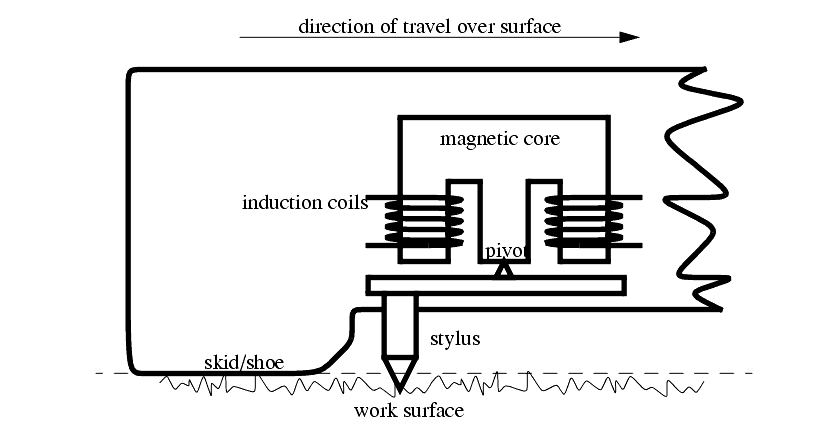
The actual apparatus uses the apparatus hooked to other instrumentation. The induction coils drive amplifiers, and other signal conditioning hardware. The then amplified signal is used to drive a recorder that shows stylus position, and a digital readout that displays the CLA/Ra value.
The paper chart that is recorded is magnified in height by 100000:1, and in length by 82:1 to make the scale suitable to the human eye.
The datum that the stylus position should be compared to can be one of three,
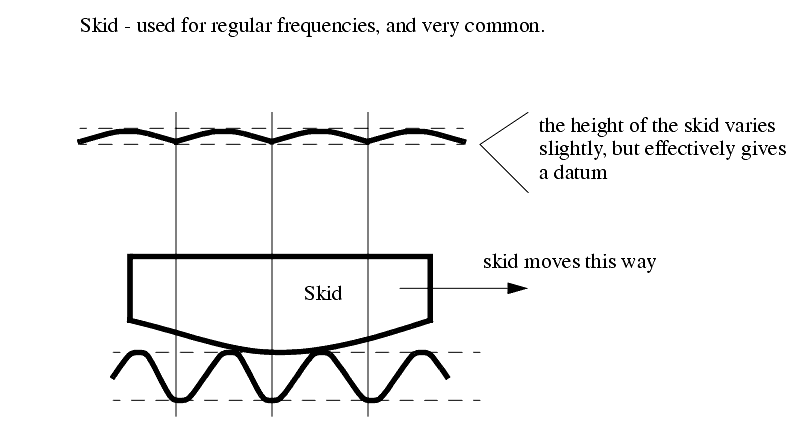
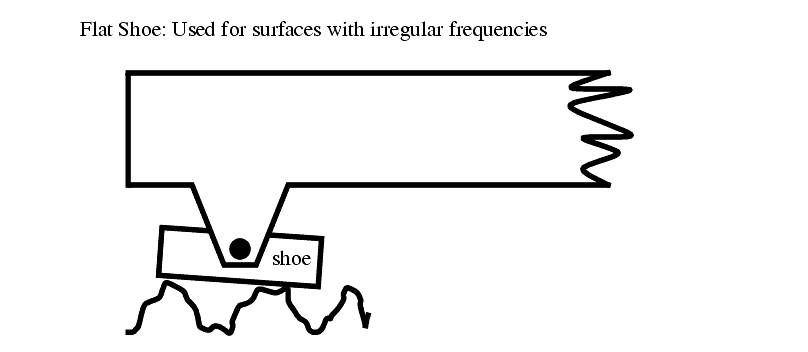
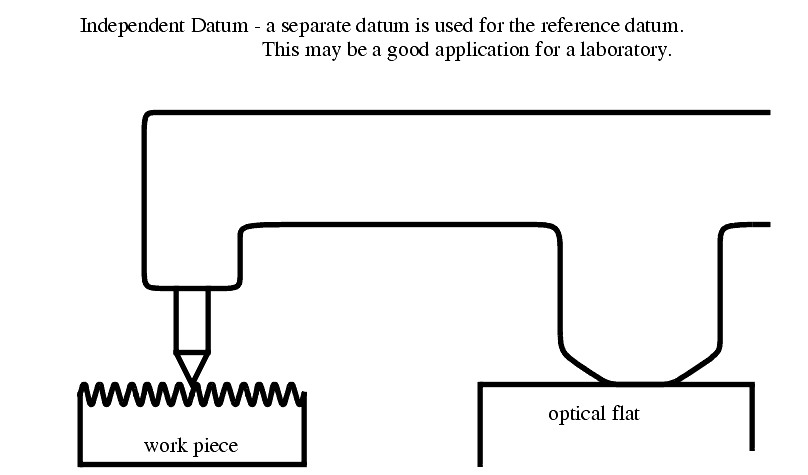
Where the scan is stopped might influence the Ra value. This is especially true if the surface texture varies within a very small section of the surface. For example,
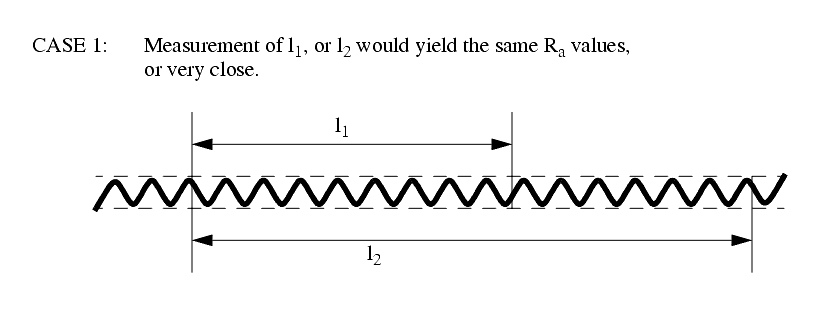
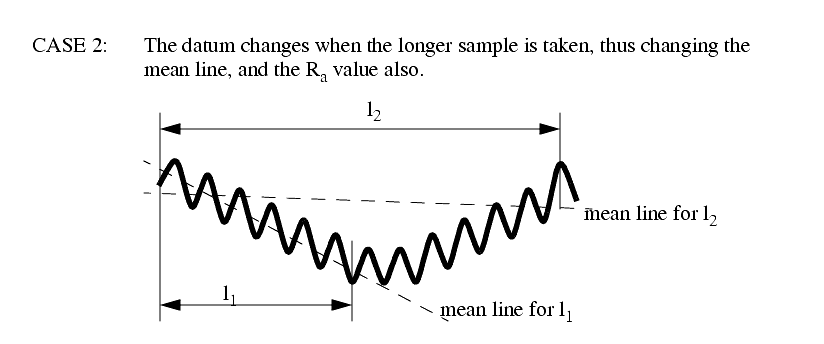
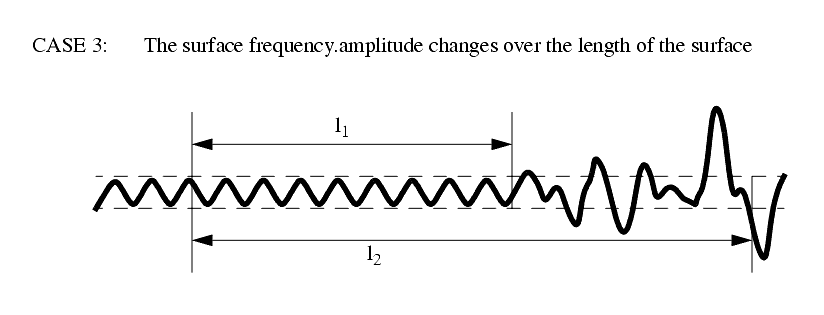
In both cases 2 and 3 above, Ra would be higher over the longer sample (l2) than over the shorter sample (l1).
The bearing surface that the skid/shoe runs on might also have an effected on the measurement.

11.2.3 Specifications on Drawings
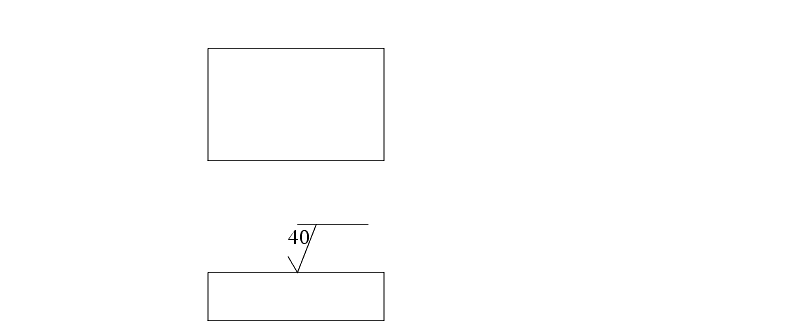
������������The following specification symbol can be used on drawings to specify surface textures desired on a completed part,
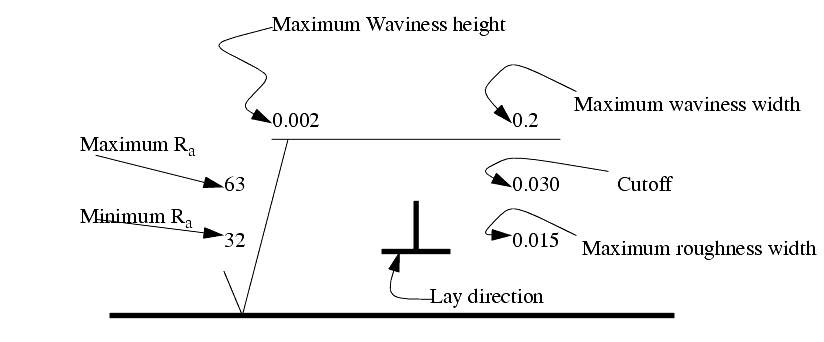
Roughness width cutoff - a value greater than the maximum roughness width that is the largest separation of surface irregularities included in the measurements. Typical values are (0.003", 0.010", 0.030", 0.100", 0.300")
The example below shows an upper limit of 40 micro in. roughness
The symbol below can specify how the roughness is to lay,

Standards CLA/Ra values used on drawings are: 1, 2, 4, 8, 16, 32, 63, 125, 250, 500 and 1000 min.
Stylus travel is perpendicular to the lay specified.
Search for More: |

Custom Search
|

|