3.6 Measuring Surface Roughness
• There are a number of useful techniques for measuring surface roughness,
- observation and touch - the human finger is very perceptive to surface roughness
- stylus based equipment - very common
- interferometry - uses light wave interference patterns (discussed later)
3.6.1 Observation Methods
• Human perception is highly relative. In other words, without something to compare to, you will not be certain about what you are feeling.
• To give the human tester a reference for what they are touching, commercial sets of standards are available.
• Comparison should be made against matched identical processes.
• One method of note is the finger nail assessment of roughness and touch method used for draw dies in the auto industry.
3.6.2 Stylus Equipment
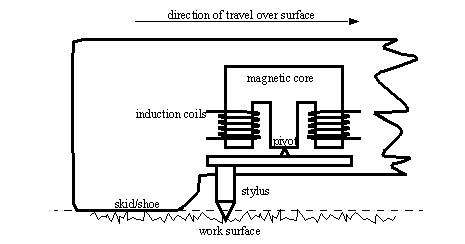
• One example of this is the Brown & Sharpe Surfcom unit.
• Basically this technique uses a stylus that tracks small changes in surface height, and a skid that follows large changes in surface height. The use of the two together reduces the effects of non-flat surfaces on the surface roughness measurement. The relative motion between the skid and the stylus is measured with a magnetic circuit and induction coils.
• The actual apparatus uses the apparatus hooked to other instrumentation. The induction coils drive amplifiers, and other signal conditioning hardware. The then amplified signal is used to drive a recorder that shows stylus position, and a digital readout that displays the CLA/Ra value.
• The paper chart that is recorded is magnified in height by 100000:1, and in length by 82:1 to make the scale suitable to the human eye.
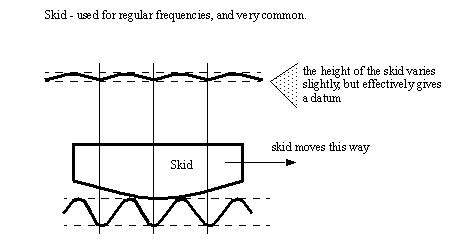
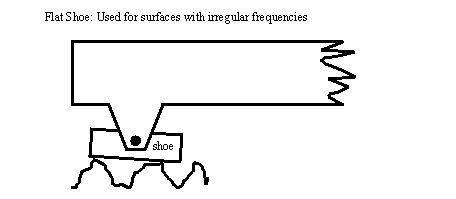
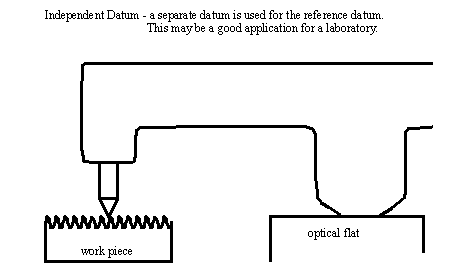
• The datum that the stylus position should be compared to can be one of three,
- Skid - can be used for regular frequency roughness
- Shoe - can be used for irregular frequency roughness
- Independent - can use an optical flat
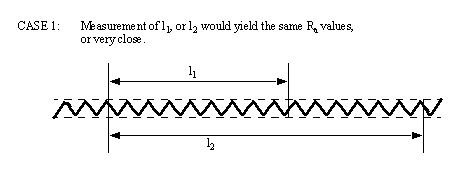
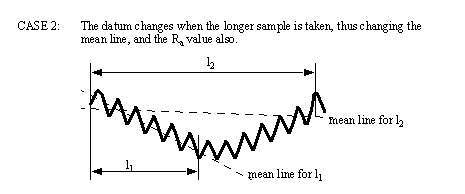
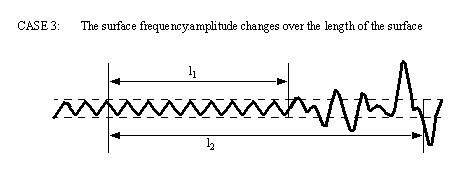
• Where the scan is stopped might influence the Ra value. This is especially true if the surface texture varies within a very small section of the surface. For example,
• In both cases 2 and 3 above, Ra would be higher over the longer sample (l2) than over the shorter sample (l1).
• The bearing surface that the skid/shoe runs on might also have an effected on the measurement.
3.6.3 Specifications on Drawings
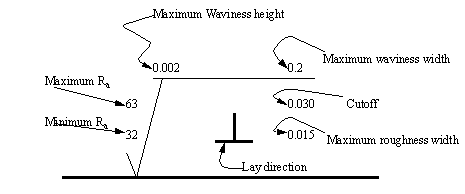
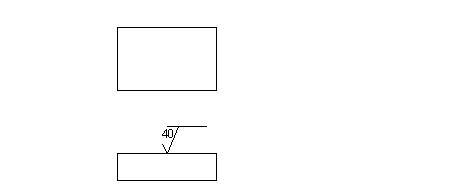
• The following specification symbol can be used on drawings to specify surface textures desired on a completed part,
Waviness height - the distance from a peak to a valley
Waviness width - the distance between peaks or valleys
Roughness width cutoff - a value greater than the maximum roughness width that is the largest separation of surface irregularities included in the measurements. Typical values are (0.003”, 0.010”, 0.030”, 0.100”, 0.300”)
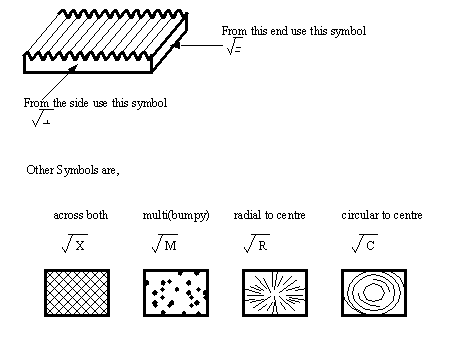
Lay - the direction the roughness pattern should follow
• The example below shows an upper limit of 40 micro in. roughness
• The symbol below can specify how the roughness is to lay,
• Standards CLA/Ra values used on drawings are: 1, 2, 4, 8, 16, 32, 63, 125, 250, 500 and 1000 μin.
• Stylus travel is perpendicular to the lay specified.
• These symbols can be related to the newer GD&T symbols
3.6.4 Other Systems
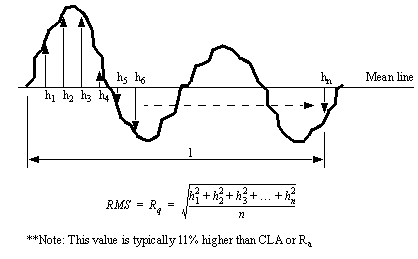
• The Root Means Squared (RMS) System (also known as Rq) is not commonly used in Canada,
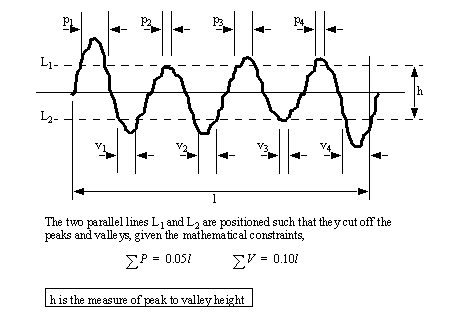
• The Peak to Valley method cuts the peaks off the wave, and then uses the band between to determine the roughness. This method is not commonly used in Canada.
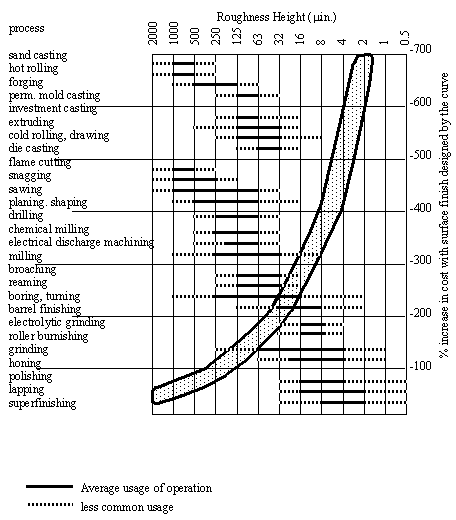
• A simple table that basically outlines the process capabilities of a number of processes is, [ANSI B46.1-1962]
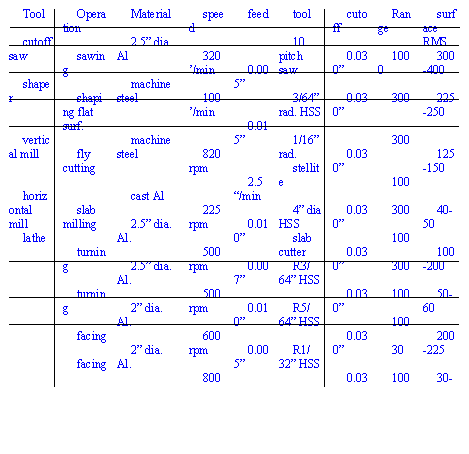
• A table of roughness measurements is given below [Krar],
3.6.5 Roundness Testing
• Roundness is of particular importance when designing components for fit and function.
• Most of the methods considered so far are suited to measuring with single points, but a round shape is a collection of points, with each point having significant influence if out of tolerance.
• Precise roundness measurement equipment is expensive
• Two fundamental methods for measuring roundness are,
- Intrinsic - uses points on the round surface to measure from
- Extrinsic - uses a separate round surface for a reference (e.g. a precision bearing)
3.6.5.1 - Intrinsic Roundness Testing
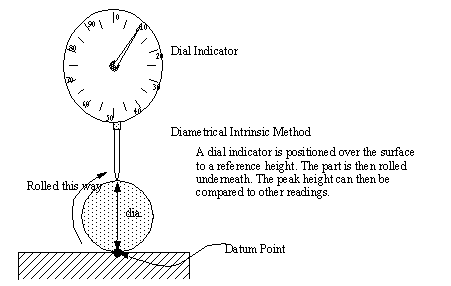
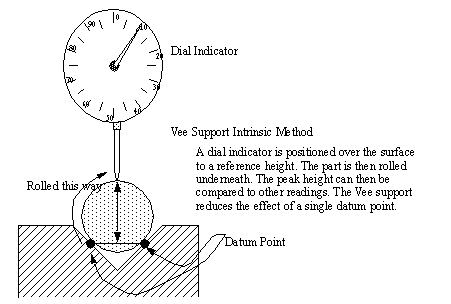
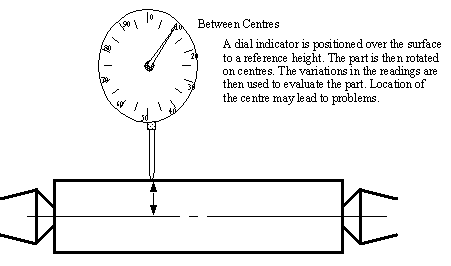
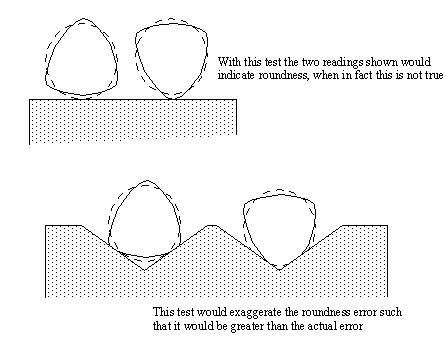
• Three methods for Intrinsic roundness testing are shown below,
• All three of the intrinsic methods are inexpensive
• The Intrinsic methods all have an important limitation. In particular, if the deformation of the round is small, the methods will deal with it reasonably, but if the deformation is large enough to make the shape non-cylindrical, then the results will err significantly.
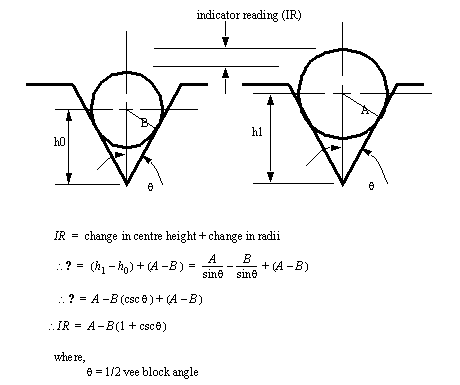
• When using The Flat Plane, or the Centre to intrinsically measure roundness, the diameters can be directly obtained, but when using the Vee block, some additional calculations are required.
• The vee block method has particular disadvantages,
- a number of angles are required (the standard angle is 90°)
- only suitable for regular odd lobed figures
• The centre support method also has disadvantages,
- The part may be bowed, or warped
- off centre or degraded centre holes will decrease reading quality
- the centres themselves can also affect readings
3.6.5.2 - Extrinsic Roundness Testing
• The features of this methods are,
1. the reference datum is not points on the object, but a separate precision bearing
2. The axis of the part being measured is aligned with the machine bearing axis
3. A stylus is moved in to contact the part, and then it moves about in a circular path
4. The deflection of the stylus is amplified onto a polar plot to be used in evaluation of the part
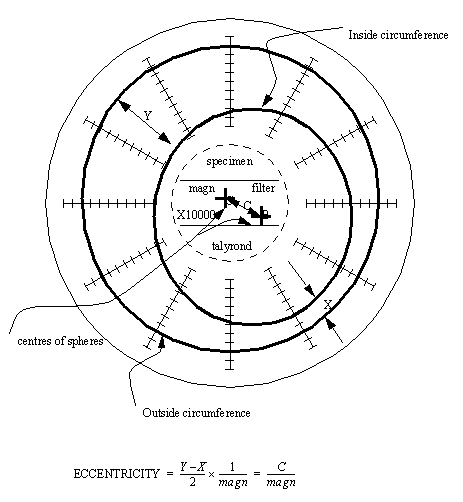
• We can measure the out of roundness value as the minimum distance between two concentric circles that enclose/envelope the trace profile. This distance must obviously be divided by the magnification.
• Only roundness deviations are amplified. This creates distortions in the trace.
• The Talyrond machine also uses a low pass electronic filter to reduce the roughness that is shown on the plot. But this still shows the lobing.
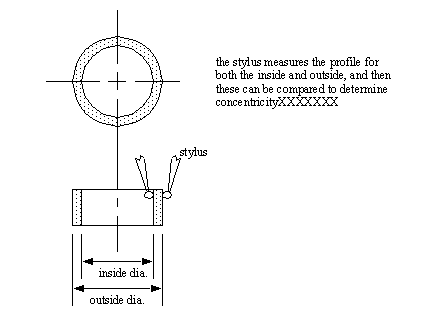
• Eccentricity - the talyrond can also be used to detect concentricity. A simple example is a bearing race shown below.
• An example of the part discussed above, is now shown in a trace from the Talyrond
